To edit text in an image in Photopea, open the image, paint out the old words with the Brush or the Healing Brush, add new words with the Type tool, and export a PNG or JPG. Photopea is a free editor that runs in your browser and uses Photoshop-style tools, so the steps are close to the ones in Photoshop. This guide follows Photopea's own tutorial on changing text in an image and its Learn pages, and it says where the manual route gets slow. If you would rather not rebuild the lettering by hand, an AI tool can edit text in an image by detecting the words and redrawing them in the original style.
What Photopea is, and what it costs
- Free, with ads. As of October 2026, Photopea's home page calls it a free online photo editor. Photopea says it is paid for mainly by advertising, and that ads may cover 5% to 15% of the screen. An optional Premium account is available from the Account button in the editor.
- Files stay on your device. Photopea's Learn page says it runs on your device, does not upload your files, and keeps working offline once the page has loaded. Its AI features are worth checking separately: Photopea's tutorial on extra AI credits refers to a Dezgo account, so find out how they handle an image before you use them on a private one.
- Many formats. The home page lists PSD, PNG, JPG, WebP and HEIC among the formats Photopea opens, along with dozens more.
Before you start: live text or flat pixels
Photopea keeps text in Type layers, which show a capital T in their thumbnail. If your file is a PSD with Type layers, click the layer with the Type tool to enter it, change the words, and confirm with the button in the top menu. You don't need the steps below.
If your file is a flat image, the words are pixels. Photopea's Open and Save page explains that once text is saved into a PNG, the letters become pixels, the font and size are lost, and the image behind the letters is gone. So the job has the two parts that Photopea's tutorial describes: remove the old text, then type new text.
Step 1: Open the image
- Go to Photopea.com and choose File > Open. You can also drag the image into the editor or paste it with Ctrl+V.
- Photopea converts every file you open to its working format, PSD, so layers work even for a JPG.
- Duplicate the image layer: right-click it in the Layers panel and choose Duplicate, or press Ctrl+J. Do the cleanup on the copy, so the original layer stays as it was.
Step 2: Remove the old words
Photopea's tutorial splits this step by what sits behind the letters.
Solid background: use the Brush
- Choose the Brush tool (B).
- Hold Alt (Option on a Mac) and click the background next to the letters. Photopea picks that color as the foreground color.
- Release Alt and paint over the words. Make the brush larger to paint faster, and pick the color again wherever the background changes.
Busy background: use the Healing Brush or the Clone Stamp
- Choose the Healing Brush, which sits just above the Brush in the toolbar.
- Hold Alt and click a clean part of the background. This sets the source.
- Release Alt and paint over the words. The source background appears under your brush. Photopea says the Healing Brush adapts the copied content to its surroundings when you release the mouse.
The Clone Stamp works the same way without that adapting step. Photopea suggests lowering the brush Hardness, so the new strokes blend smoothly into the old content.
Quick option: use the Spot Healing Brush
Photopea's Smart Tools page says these tools use artificial intelligence. With the Spot Healing Brush you draw over the unwanted area and release the mouse, and Photopea replaces the area with content from around it. The page says this usually takes 1 to 5 seconds, and up to 10 seconds in extreme cases. The Patch tool works differently: you select the area, then drag the selection to the place that should be copied.
Zoom in to check the result. Use these tools only on images you own or have permission to change, and leave watermarks, credits and copyright notices in place.
Step 3: Type the new words
- Choose the Type tool (T) and click where the text should begin. To make a paragraph instead, drag a rectangle.
- Type the new words. Then select them (Ctrl+A) and use the top bar to set the font, size and color.
- Open Window > Character and Window > Paragraph for spacing and alignment.
- Choose the font. Photopea says it has a large database of royalty-free fonts. To use your own, open the TTF or OTF file with File > Open, or drag it in, and Photopea adds it to the end of the font list. To work out which font an image uses, see how to identify a font from an image.
- Confirm the change with the button in the top menu. While you are inside a text layer, Photopea locks everything else, so confirm or cancel before you do anything else.
Step 4: Match the angle and the look
- Angle and perspective. Choose Edit > Free Transform. Drag outside the box to rotate, drag a corner to resize, and hold Ctrl while you drag a corner to apply perspective. The Warp button offers presets such as Arch and Flag for text on a curved surface. The Free Transform page lists every control.
- Effects. Photopea's tutorial points to Layer Styles such as Drop Shadow, Stroke and Gradient Overlay for rebuilding shadows and outlines.
- Softness. Filters can't be applied to a text layer until you rasterize it (right-click it and choose Rasterize). That turns the letters into pixels, so do it last, after the spelling is final. Then a small blur from the Filter menu can match the softness of the photo.
Step 5: Export
- Choose File > Save as PSD to keep the layers, so you can change the text again later.
- Choose File > Export As, then PNG or JPG. The Save for Web window lets you choose the format and the size.
- Open the exported file and read every letter once more.
Photopea, Photoshop and an AI text tool compared
| Photopea | Photoshop | AI text tool such as EditText.ai | |
|---|---|---|---|
| Cost (as of October 2026) | Free to use, supported by ads; optional Premium account | US$22.99 a month on an annual plan billed monthly, per Adobe's Photoshop page | One free Standard edit with a watermark, then plans from $9 a month |
| Where your image goes | Stays on your device, per Photopea; check its AI features separately | Desktop app; some generative features need an internet connection | Uploaded for processing; private to your account |
| Fonts | Pick from its font list or open your own TTF or OTF file | Match Font suggests similar fonts | No font to pick; the image guides the lettering |
| Texture, light and perspective | Matched by hand | Matched by hand, with Remove tool, Content-Aware Fill and Generative Fill to help | Redrawn by the AI; results vary |
| Skill needed | Medium to high | High | Low |
| A good fit for | Free manual edits and layered PSD files | Print and brand work | Stylized or textured lettering and many lines |
Our guide to editing text in an image in Photoshop covers the Photoshop steps.
Where Photopea gets hard
- Matching by hand. Texture, lighting and perspective are your job, and hand-drawn lettering usually has no matching font to find.
- Ads. They take part of the screen, which matters on a small laptop or a phone.
- Your hardware. Photopea's home page says the better your hardware, the better it runs, so a large image on an older device can feel slow.
- Patterns. The healing tools can smear bricks, fabric or wood grain, so check the area at 100%.
- AI limits. Photopea's home page says you can replace any part of an image with new content from a text description. Photopea's tutorial says a Premium account can use its AI features hundreds of times a month. Image generators often misspell new words, so type the final words with the Type tool. Our post on why AI image generators can't spell explains why.
Photopea is still the better choice when you want a free tool, need the file to stay on your device, or have a layered PSD with live text.
When an AI text tool saves time
An AI text tool replaces steps 2 to 4 with one pass, so it usually means fewer steps when the lettering is stylized or sits on texture. With EditText.ai, you upload a PNG, JPG or WebP image up to 14 MiB and the text is detected automatically and listed line by line. You type new words beside the lines you want to change and leave the other lines alone. Then you choose Standard or High quality, apply the change, compare the result with the original at full size, and download the PNG.
There is no font to pick, because the image itself guides the lettering. That makes it a good fit when you want to edit text without changing the background, such as a title over rock, sky or fabric.
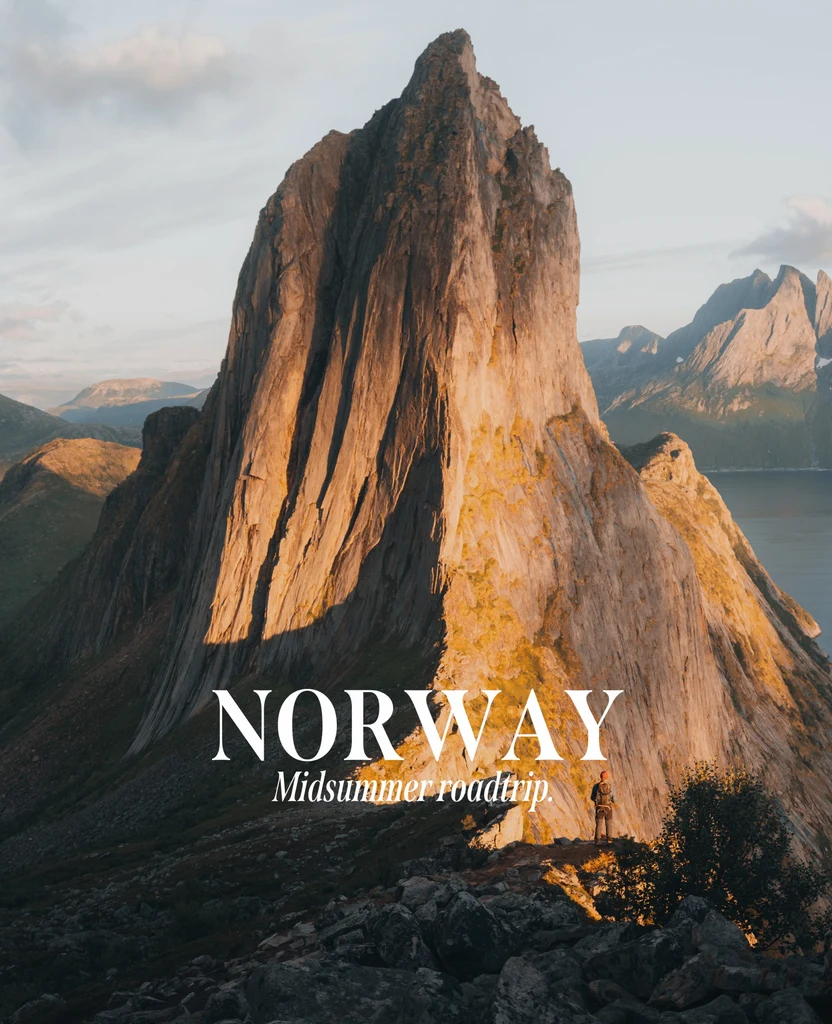
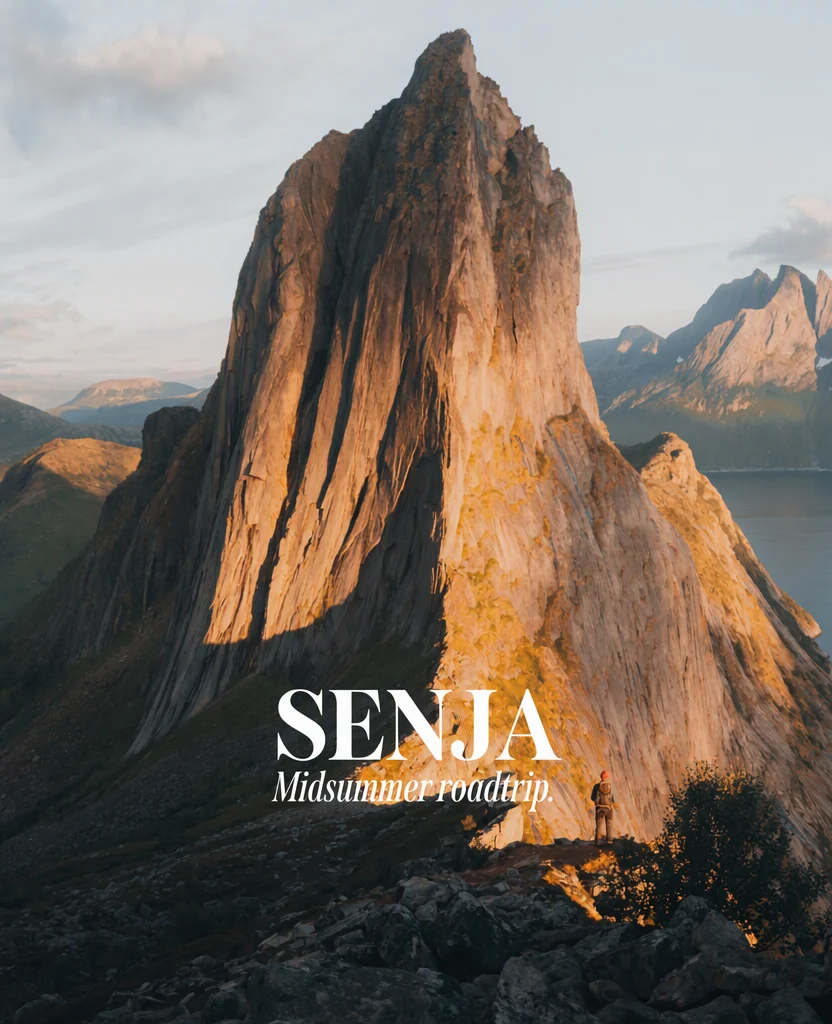
Before and after: NORWAY changed to SENJA (from the EditText.ai examples). A title over rock has no flat color to paint over, so a manual edit needs the healing tools and several checks.
At 1K, Standard uses 1 credit and High quality uses 2 credits. On a paid plan you can also choose 2K or 4K, where Standard uses 2 or 3 credits and High quality 5 or 7. Every account includes one free Standard edit, which carries a watermark. Plans cost $9, $29 or $49 a month for 10, 35 or 60 credits, as listed on the pricing page.
Results can vary, especially with unusual lettering or detailed backgrounds, so check the finished image at full size. You can't choose a font. EditText.ai accepts PNG, JPG and WebP, so a HEIC photo needs converting first. Photopea lists HEIC among the files it opens, so you can open the photo there and export a JPG or PNG copy. If you need exact brand typography and have the source file, edit the source file instead.
Which route should you choose?
- You have a PSD with live text: edit the Type layer in Photopea or Photoshop.
- You want a free tool that keeps files on your device: use Photopea.
- You need print-ready or brand-exact type: the Photoshop steps give you the most control.
- The lettering is stylized, textured or spread over many lines: try an AI text tool first.
- You need the words in another language: translate text in an image.
- You only need the words gone: remove text from an image.
For a wider look at every method, including Canva and phone apps, see how to edit text in an image.
Edit the words with AI
If the manual route is more work than the job deserves, upload your picture to edit text in an image and compare the result with the original. If you want to keep the same lettering style, read how to edit text in an image with the same font. Only edit images you own or have permission to change, don't erase watermarks or credits, and don't alter documents or screenshots to mislead anyone.
Frequently asked questions
Is Photopea really free?
Yes. As of October 2026, Photopea's home page calls it a free online photo editor, and Photopea says ads, which may cover 5% to 15% of the screen, are its main source of income. It also offers an optional Premium account from the Account button in the editor.
Can I edit text in a JPG with Photopea?
Yes. Open the JPG, remove the old words with the Brush, Healing Brush or Spot Healing Brush, type new words with the Type tool, and export a PNG or JPG. In a flat JPG the words are pixels, so you rebuild them. If you have the PSD the image came from, open that and edit the Type layer instead.
Does Photopea upload my image?
Photopea says it runs on your device and does not upload your files, and that it keeps working offline once the page has loaded. Its AI features are the part to check, because Photopea's tutorial on extra AI credits refers to a separate Dezgo account.
How do I change the font in Photopea?
Select the text with the Type tool and choose a font in the top bar, or open Window > Character. Photopea has a large library of royalty-free fonts. To add your own font, open the TTF or OTF file with File > Open or drag it into the editor.
Can Photopea remove text from an image?
Yes. On a solid background, paint over the words with the Brush in the background color. On a busy background, use the Healing Brush, the Clone Stamp or the Spot Healing Brush. Check the result at full size, because patterns can smear.