Edit text in a product photo of your packaging, labels or apparel
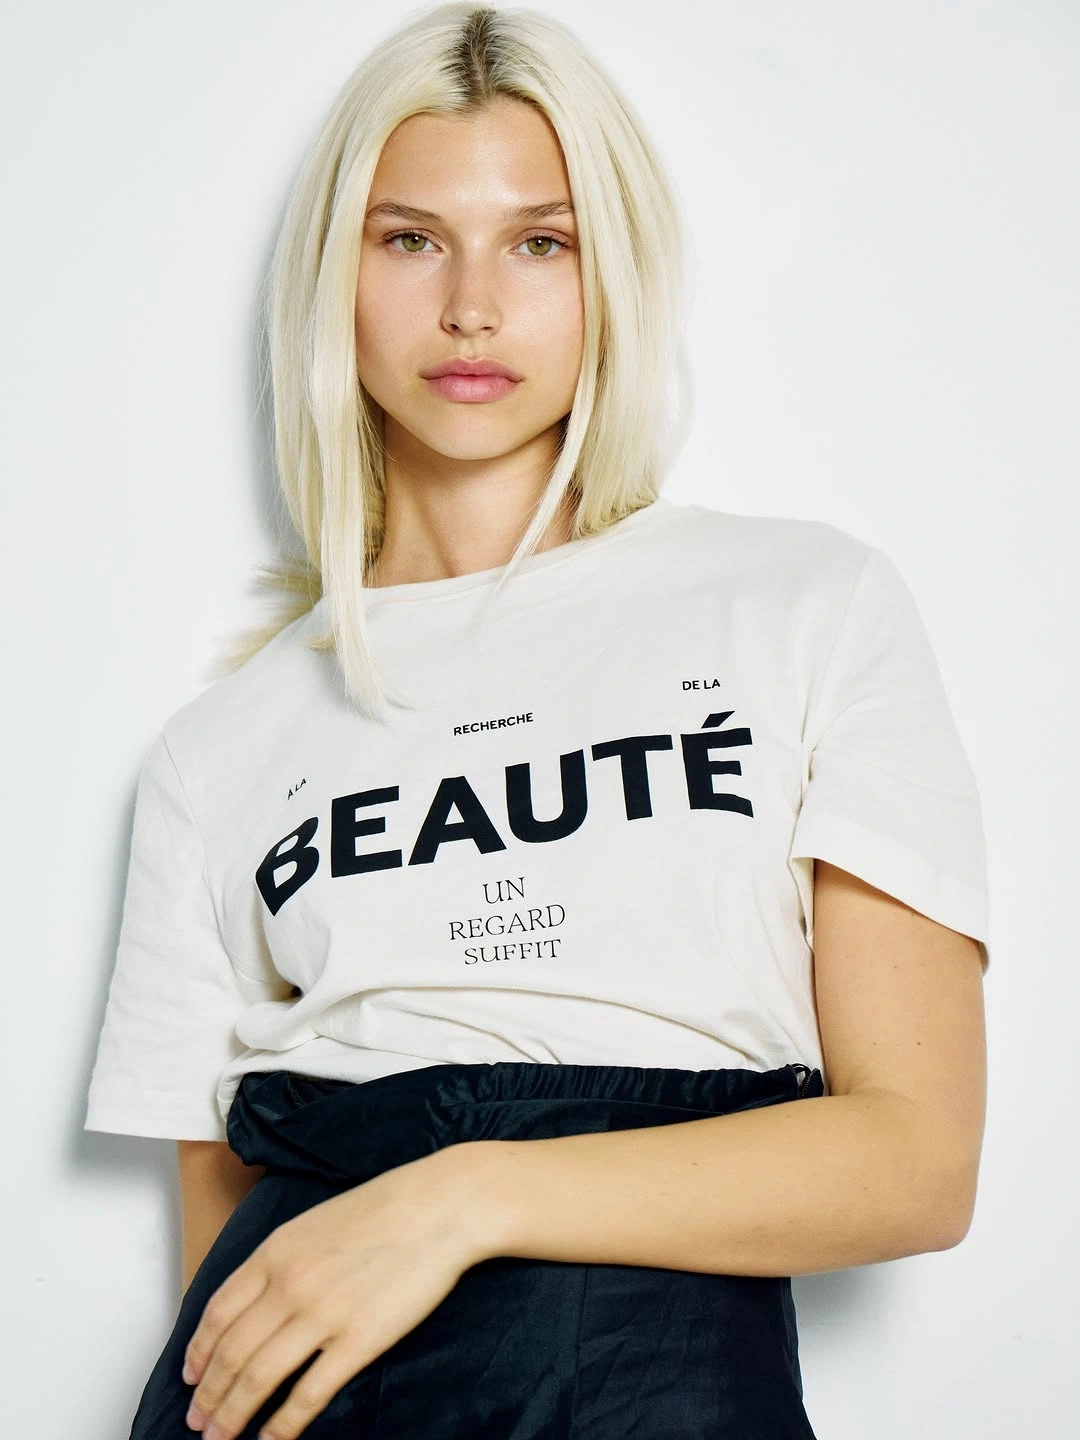
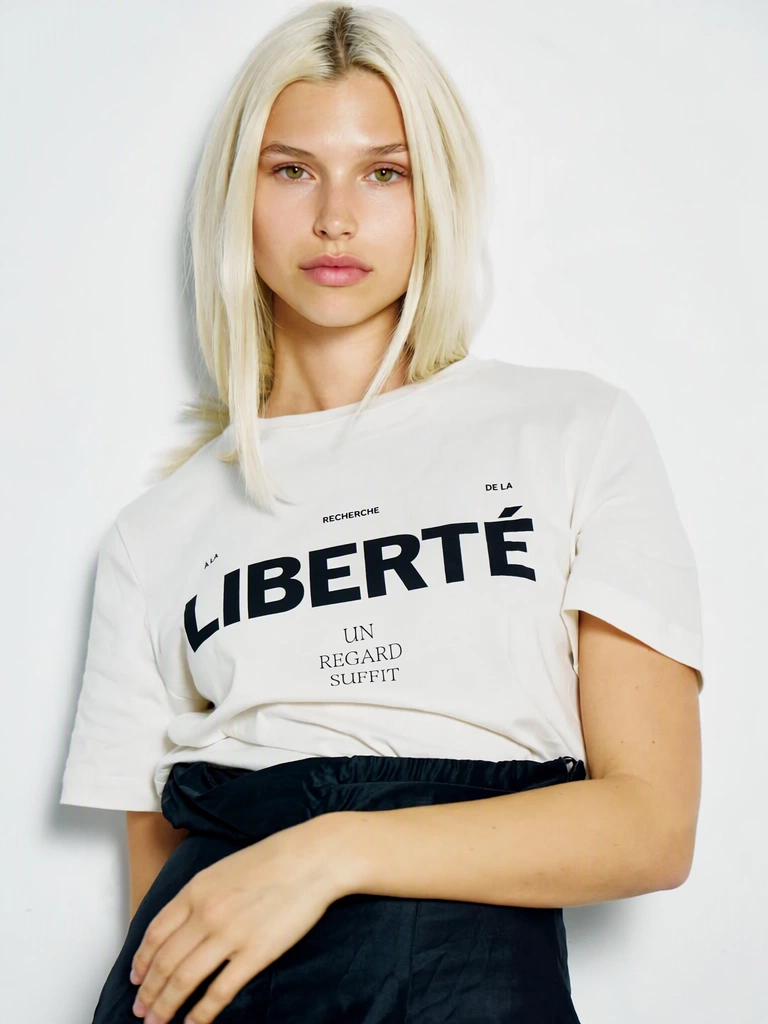
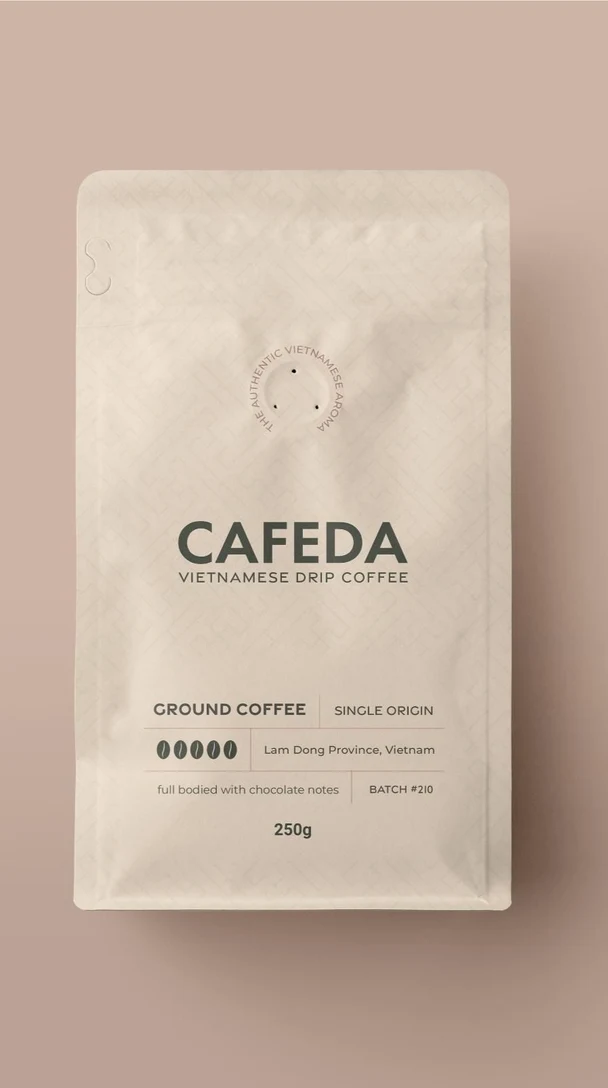
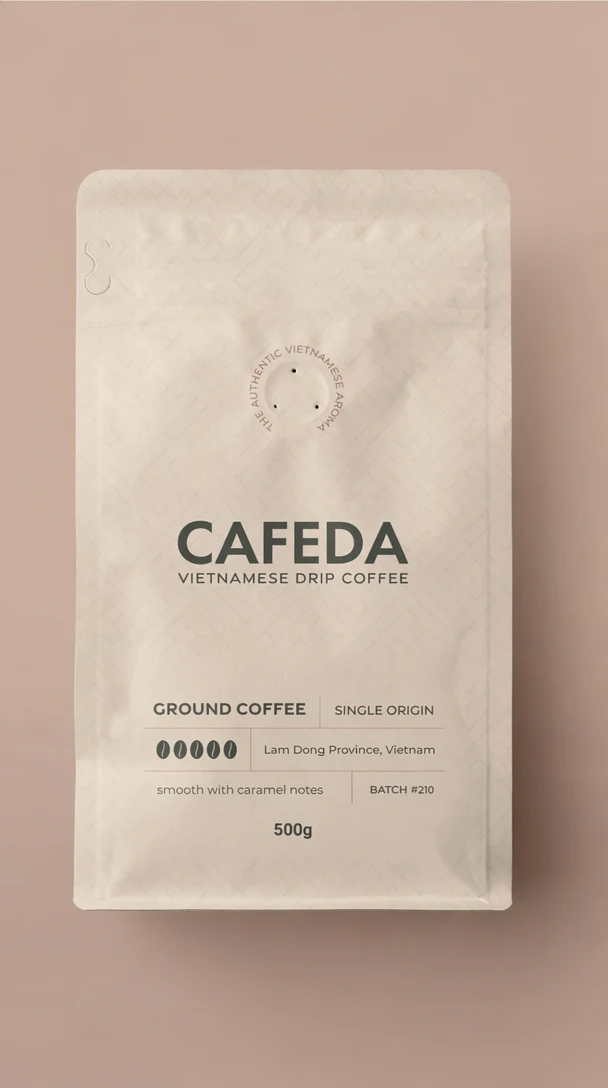
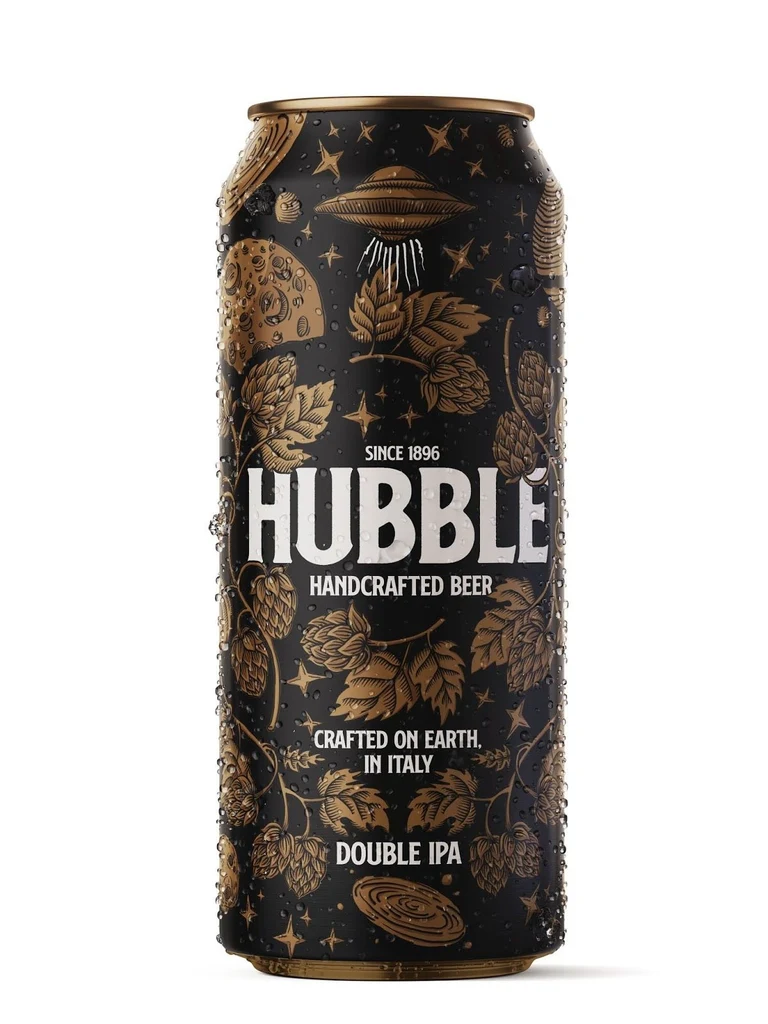
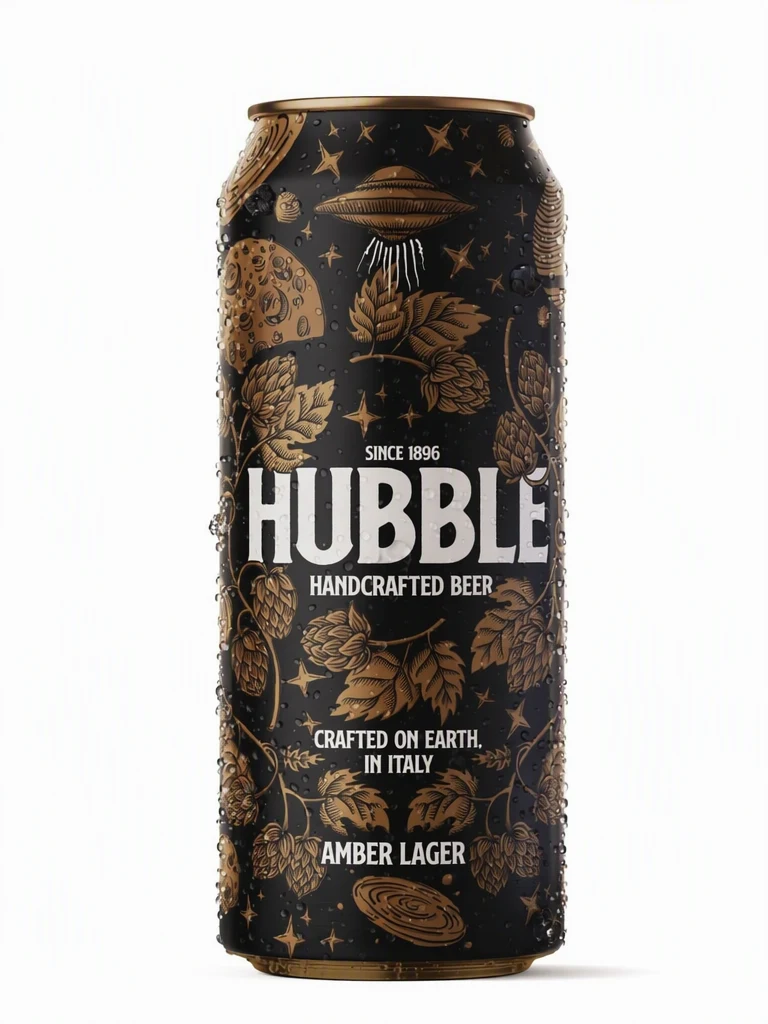
If you make or sell your own products, you can edit text in a product photo of your packaging, labels or apparel: a new flavor or scent name on a pouch, a different size on a label, or a new word on a printed T-shirt. Review each result against the real product before you use it.
Or drop an image here. PNG, JPG or WebP, up to 14 MiB.
Your image stays on this device until you sign in.
Sign in with Google to upload. Your first Standard edit is free and includes a watermark.
Examples
How it works
Pick a photo with the words facing the camera
Choose a sharp shot with the text facing the lens and no glare on the letters. Lettering that wraps far around a bottle or can is harder to replace than lettering on a flat box or pouch.
Locate the variant name
Packaging often carries many small lines of text. Find the flavor, size or color name among the Original entries, correct it first if a letter was read wrongly, and leave the rest unchanged.
Enter the new flavor, size or color
Type the new name in its Replacement field. A name of roughly the same length keeps the label balanced, and accented letters should be typed the way the real product prints them.
Choose High quality for curves, shine and fabric
Switch to High quality when the text bends around a container, sits on foil or glossy film, or is printed on fabric with folds. Then select Apply changes.
Compare it with the real item
Check that the new word follows the surface and that highlights, folds and seams still run through it. Download the PNG only when the photo matches the item a customer will receive.
What to change in your product photos
Variant names are a typical edit: a flavor or scent on a pouch, a color name on a tag or a size line on a box. When the packaging for each variant is identical apart from those words, one good photo can be the starting point for the others, as long as each result matches its real product.
Check what the new words imply about the item. A size change is only accurate when the container really looks the same, and a color name should change only when the color in the photo matches it, for example when a shade is renamed.
Packaging teams can also preview a new name or tagline on the current pack before anything is printed, so the change can be reviewed on a realistic photo. Mark these images as previews until the printed packaging exists.
For T-shirts, tote bags and mugs, the same approach shows a new printed word or a customer's name on the item. Type names exactly as the customer gave them, accents included, and check the spelling letter by letter.
Curves, reflections and fabric
Text on bottles, cans and jars bends with the surface and gets narrower toward the edges. The photo guides the shape of the new word, but results are less predictable near those edges, where letters turn away from the camera. A front-facing shot with the word near the middle of the curve is a better starting point.
Glossy film, foil and glass add highlights that cross the letters, and those highlights can change along with the text. Check that a highlight still runs across the new word in the same direction and that the material still looks like foil or glass. Soft, even light during the shoot reduces the problem.
On fabric, folds, seams and the weave run through printed letters. A garment laid flat or worn without deep creases usually edits more cleanly than a crumpled one. Check that wrinkles continue through the new word and that its print texture matches the rest of the garment's print.
Keep label information accurate
A new name can make other parts of the photo wrong. Before you edit text in a product photo that also shows a side or back panel, check whether the ingredients, allergens or nutrition facts there still describe the product in the new image. If they do not, photograph the real variant instead.
Small print needs extra care. Detection can miss tiny lines, and you can enter them with Add text, but change small print only when the new wording matches the real label, and show claims such as organic or vegan only where the product qualifies. Do not edit barcodes, batch codes or certification marks.
Frequently asked questions
Can I upload product photos straight from my iPhone?
Yes, as long as the photo is a JPG, PNG or WebP image of 14 MiB or less. HEIC, the default photo format on many iPhones, is not supported, so export or share those photos as JPG first. To skip that step, switch the camera format to the most compatible option in your iPhone settings before your next product shoot.
Will the new word keep the texture of embroidery or a woven label?
It can, but raised thread is one of the harder surfaces to reproduce. The photo guides the texture of the new letters, so choose High quality and use a close, sharp shot where individual stitches are visible. Compare the stitch direction and thickness with the letters you left unchanged, and simplify the word or try again if the texture looks flat.
How do I keep a set of variant photos consistent?
Start every variant from the same original photo, change only the name line and use the same quality level each time. Then view the finished images side by side at the same size. If one name looks heavier, sits lower or follows the curve differently from the others, run that variant again before you publish the set, or redo the whole set in High quality.
Can I add a word where the product has no text?
EditText is built to change or remove text that is already in the photo. Add text is for words that are on the product but were not detected. For a blank shirt, an unlabeled jar or an empty side of a box, place the design in your mockup or design software instead, or print a sample and photograph it.
Can I use an edited photo in my store listing?
Yes, if it shows the item exactly as buyers will receive it, including the name, size and label details. Marketplaces set their own rules for product images, so read the current image guidelines of the store you sell on before you upload. Your unedited original stays in My images, which helps if you later need to check what changed.
Try it on your own image
Or drop an image here. PNG, JPG or WebP, up to 14 MiB.
Your image stays on this device until you sign in.
Sign in with Google to upload. Your first Standard edit is free and includes a watermark.